



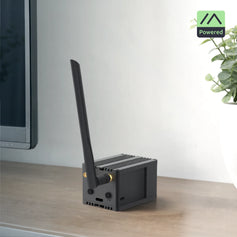


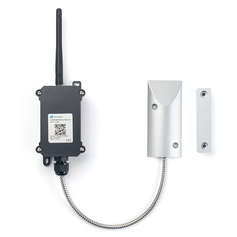


A single Meshtastic node only covers what's in range of wherever you're carrying it. A fixed, elevated repeater changes that, it sits on a roof, mast, or hilltop 24/7, relays everything that passes through, and never needs its battery swapped because the sun does that job. This guide walks through two solar repeater options we carry the RAKwireless WisMesh Repeater Mini and the Seeed SenseCAP Solar Node P1-Pro and how to actually install one so it delivers the range you're paying for.
Two solar repeaters, two different jobs
WisMesh Repeater Mini is built around the RAK4631 (Nordic nRF52840 + Semtech SX1262), the same proven platform behind most WisBlock nodes. It packs a 3200 mAh Li-Ion battery, an integrated solar panel, and an IP67-rated enclosure (150 × 100 × 50 mm) into a compact unit with an RP-SMA antenna connector and a WisMesh Blade Antenna included. It's the more affordable, more compact of the two, good for suburban rooftops, gardens, and moderate climates where the sun isn't scarce for weeks at a time.
If you'd rather not source a mount and antenna separately, the Outdoor Repeater Kit bundles the same Repeater Mini with a 6 dBi omnidirectional antenna and pole-mount hardware, everything needed to bolt it to a mast in one box.
SenseCAP Solar Node P1-Pro is the heavier-duty option: a 5W solar panel feeding four 18650 cells for roughly 13,400 mAh of buffer capacity, enough to keep relaying through extended overcast periods plus built-in GPS/GLONASS/Galileo for a repeater that can report its exact position. It's rated to operate down to -40°C, which matters if you're mounting somewhere genuinely exposed (an unheated mast in winter, a remote hilltop). It ships with mounting brackets for either a wall or a 70–100 mm pole.
|
WisMesh Repeater Mini |
SenseCAP Solar Node P1-Pro |
|
|
Platform |
RAK4631 (nRF52840 + SX1262) |
XIAO nRF52840 + Wio-SX1262 |
|
Battery |
3200 mAh Li-Ion |
4× 18650 (~13,400 mAh) |
|
Solar panel |
Integrated, compact |
5 W panel |
|
GPS |
No |
Yes (GPS/GLONASS/Galileo) |
|
Operating range |
Standard outdoor (IP67) |
-40°C to 60°C |
|
Mounting |
Bracket (Kit adds pole mount + 6 dBi antenna) |
Wall or 70–100 mm pole bracket included |
|
Best for |
Rooftops, gardens, moderate climates |
Remote, exposed, or extreme-climate sites |
Installing the repeater
1. Configure before you climb anything. Pair the device with the Meshtastic app first, set the region to EU868, and switch its role to Repeater (or Router, if it also needs to originate traffic). Disable Bluetooth or GPS broadcast if you don't need them running constantly, every bit of power saved extends how long the battery bridges a stretch of bad weather. Do this on a table, not on a ladder.
2. Pick the site before the bracket. Line-of-sight to the nodes you want to reach matters more than raw height. Walk or check the candidate location against your other nodes on a map, tools like heywhatsthat.com can estimate line-of-sight over terrain and rule out anything with a hill, building, or dense treeline directly in the path. A repeater two floors up with a clear view beats one on the highest roof if that roof faces the wrong valley.
3. Mount the bracket, then orient the solar panel, not the antenna first. Face the panel south in the northern hemisphere (north in the southern hemisphere) and tilt it roughly to your latitude for balanced charging across seasons. Check for shading not just today but through the year: a tree that's bare in winter can fully shade a panel by summer. Aim for a spot that gets clear sun through the middle of the day, not just morning or evening light.
4. Attach or upgrade the antenna. The stock antenna on the Repeater Mini gets you on the air, but a dedicated outdoor repeater is exactly the device worth pairing with a better antenna, our tuned EU868 antennas range from 3 to 9 dBi depending on how flat or hilly your coverage area is (more on choosing gain below). Keep the coax run as short as the mounting allows; every extra metre of cheap cable quietly eats into your range budget. If you do need a longer run, use LMR-400 rather than thin RG-174 pigtail.
5. Weatherproof every connector, even the sealed ones. IP67 housings protect the electronics, but exposed SMA/N-type joints between antenna and cable still benefit from self-amalgamating tape wrapped over them, water finds its way into connectors through capillary action over months, not days. If the repeater sits on a genuinely tall mast, add a lightning arrester inline; it's cheap insurance against a single bad storm taking out the node.
6. Test before you consider it finished. Once mounted, check the app for the repeater's signal reports from a few other nodes at range, and check its battery/solar telemetry over the following few days rather than assuming it's fine. It's much easier to adjust tilt or reposition an antenna in week one than to discover a charging problem in December.
Placement tips that actually move your range
- Elevation and line-of-sight beat raw distance. A repeater 15 metres up with a clear view will consistently outperform one 40 metres up behind a ridge. Height only helps if it buys you a clearer path.
- Match antenna gain to the terrain, not just the biggest number. High-gain omnidirectional antennas (9+ dBi) squash their radiation pattern flatter, great for long flat-terrain links, but a bad match for a repeater mounted high on a hill that needs to also cover the valley floor below it. For an elevated repeater covering a mixed area, a moderate 3–6 dBi antenna often performs better in practice than the highest-gain option on the shelf.
- Re-check line-of-sight seasonally. Foliage that's transparent in April can be a solid wall of leaves by August. A site that tested well in spring can quietly lose range through summer, worth a follow-up range check after leaf-out.
- One well-placed repeater beats several badly placed ones. Before buying a second unit to patch a dead zone, double-check whether repositioning the first, a few metres higher, a cleaner sightline, a better antenna, solves it more cheaply.
- Don't neglect the solar side of "placement." A perfectly sited repeater that's shaded from 1pm onward will still brown out in winter. Solar orientation deserves the same care as RF line-of-sight, not an afterthought once the mount is already bolted down.
Which one should you buy?
For most home, garden, or neighbourhood-mesh setups, the WisMesh Repeater Mini (or the Outdoor Repeater Kit if you want the antenna and pole hardware included) covers it, compact, proven, and easy to mount on a normal roof or fence post. If you're deploying somewhere genuinely remote or climate-extreme, an unheated mast, a mountain site, a location you won't be able to check on for weeks, the SenseCAP Solar Node P1-Pro's larger battery buffer and wider operating range, plus GPS for confirming exactly where it ended up, make it the safer choice for unattended, long-term coverage.


